
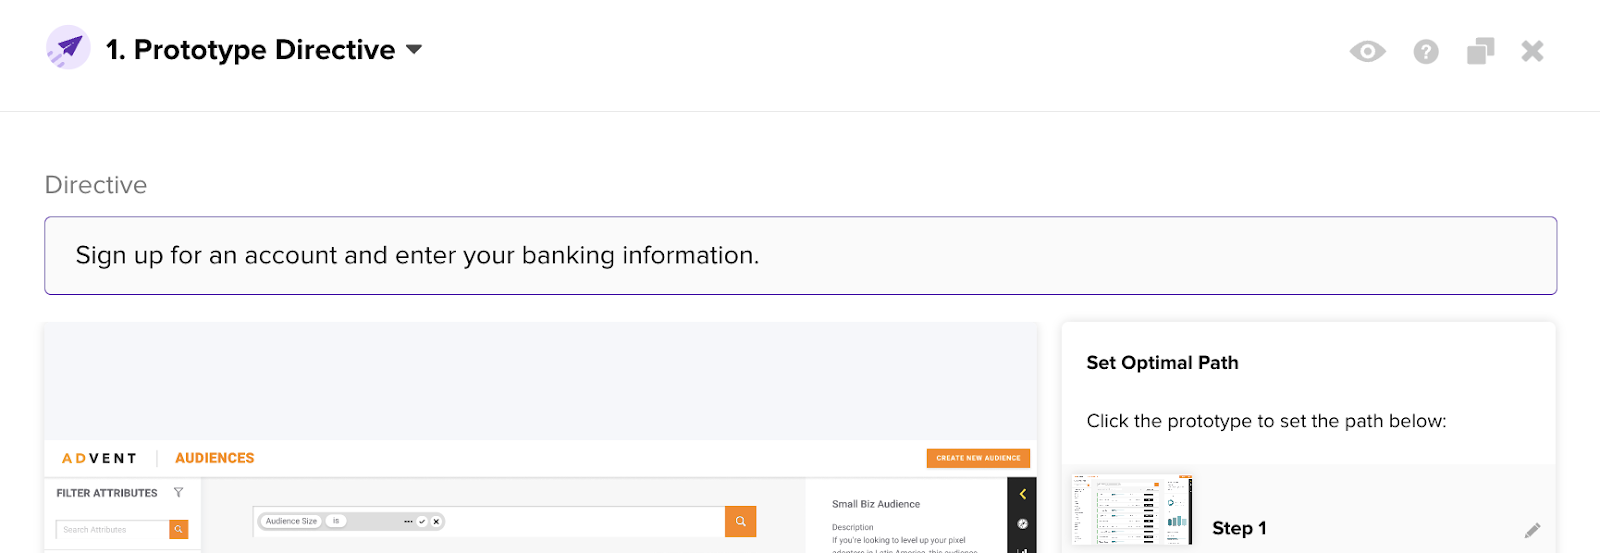
Prototype Directive

Questions answered in this article:
Upload Figma link
When you first open the prototype directive question, if you have not yet authorized Figma on your account, you will be prompted to do so.
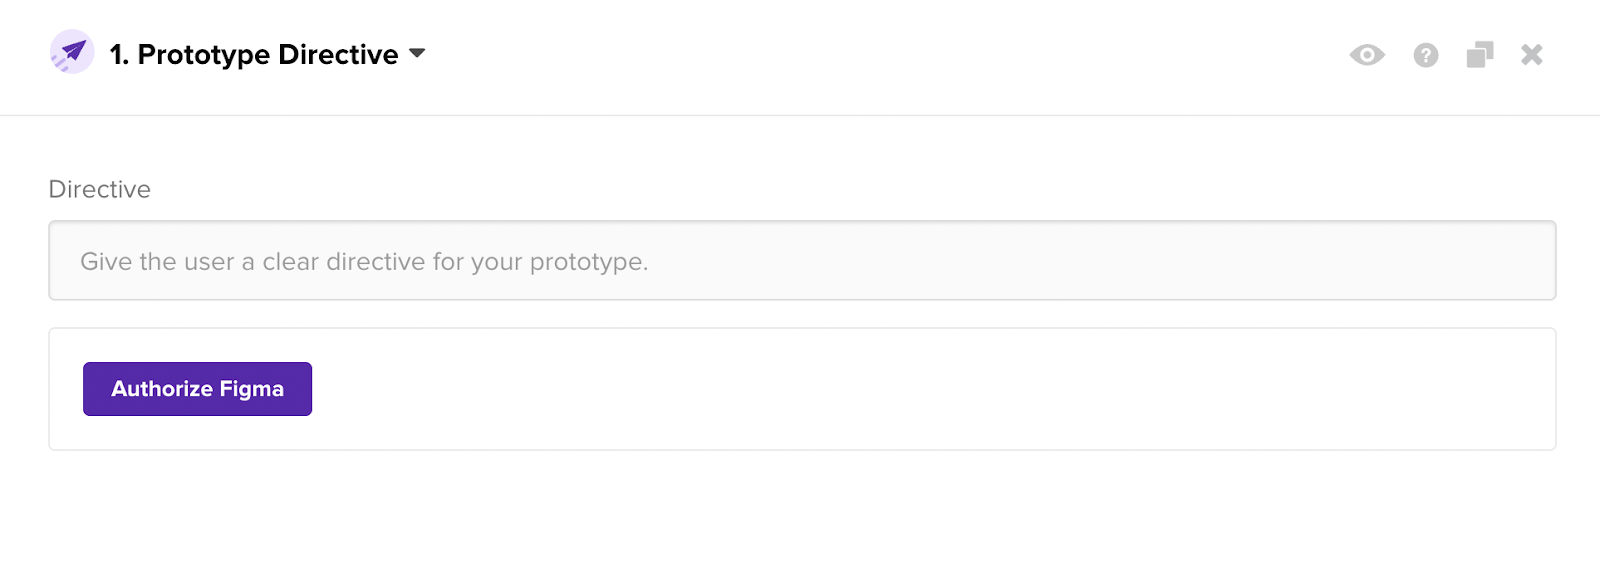
Click on the Authorize Figma button to be taken to the User Settings page and complete the authorization process. On the Security and Account Access tab, click Authorize Figma at the bottom of the page. The process will quickly take you to your Figma account, where you will be asked to provide permission for Helio to access your Figma creative assets.
Once the authorization is complete, you can close the authorization tab and refresh the test creation page.
You should see an entry box appear for you to add your Figma prototype link. Paste the share link from your Figma prototype into the entry box and press Upload.
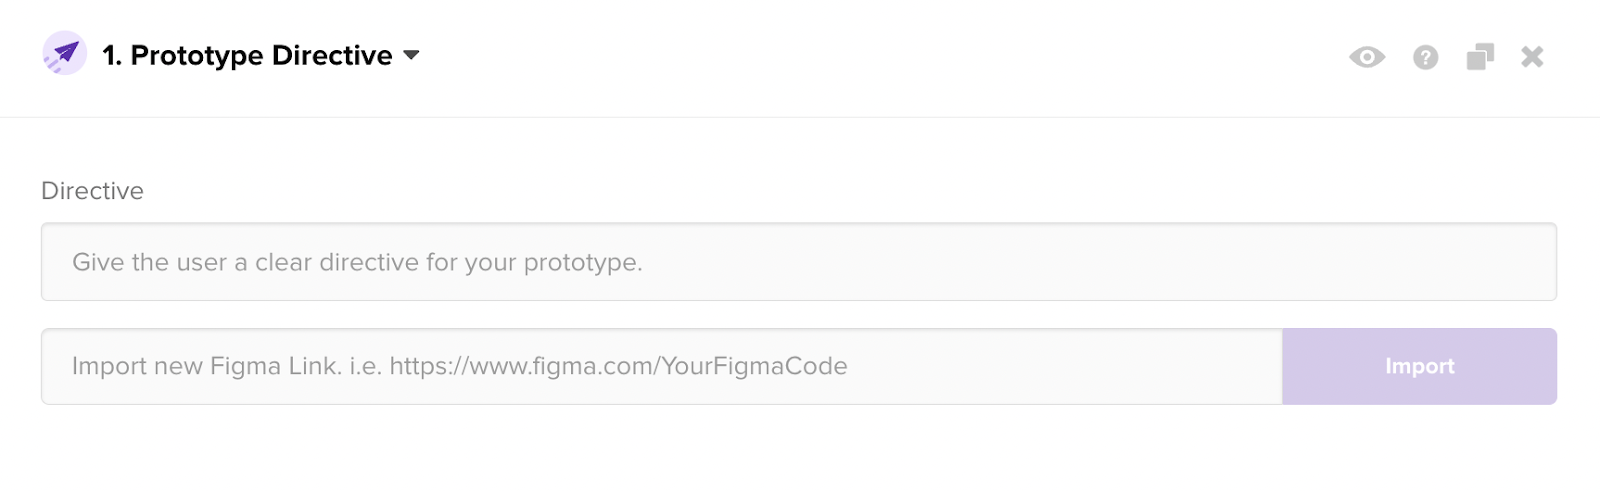
Note: your prototype share permissions in Figma must be set to “Anyone with the link” can view so that your test participants can see and use mock up.
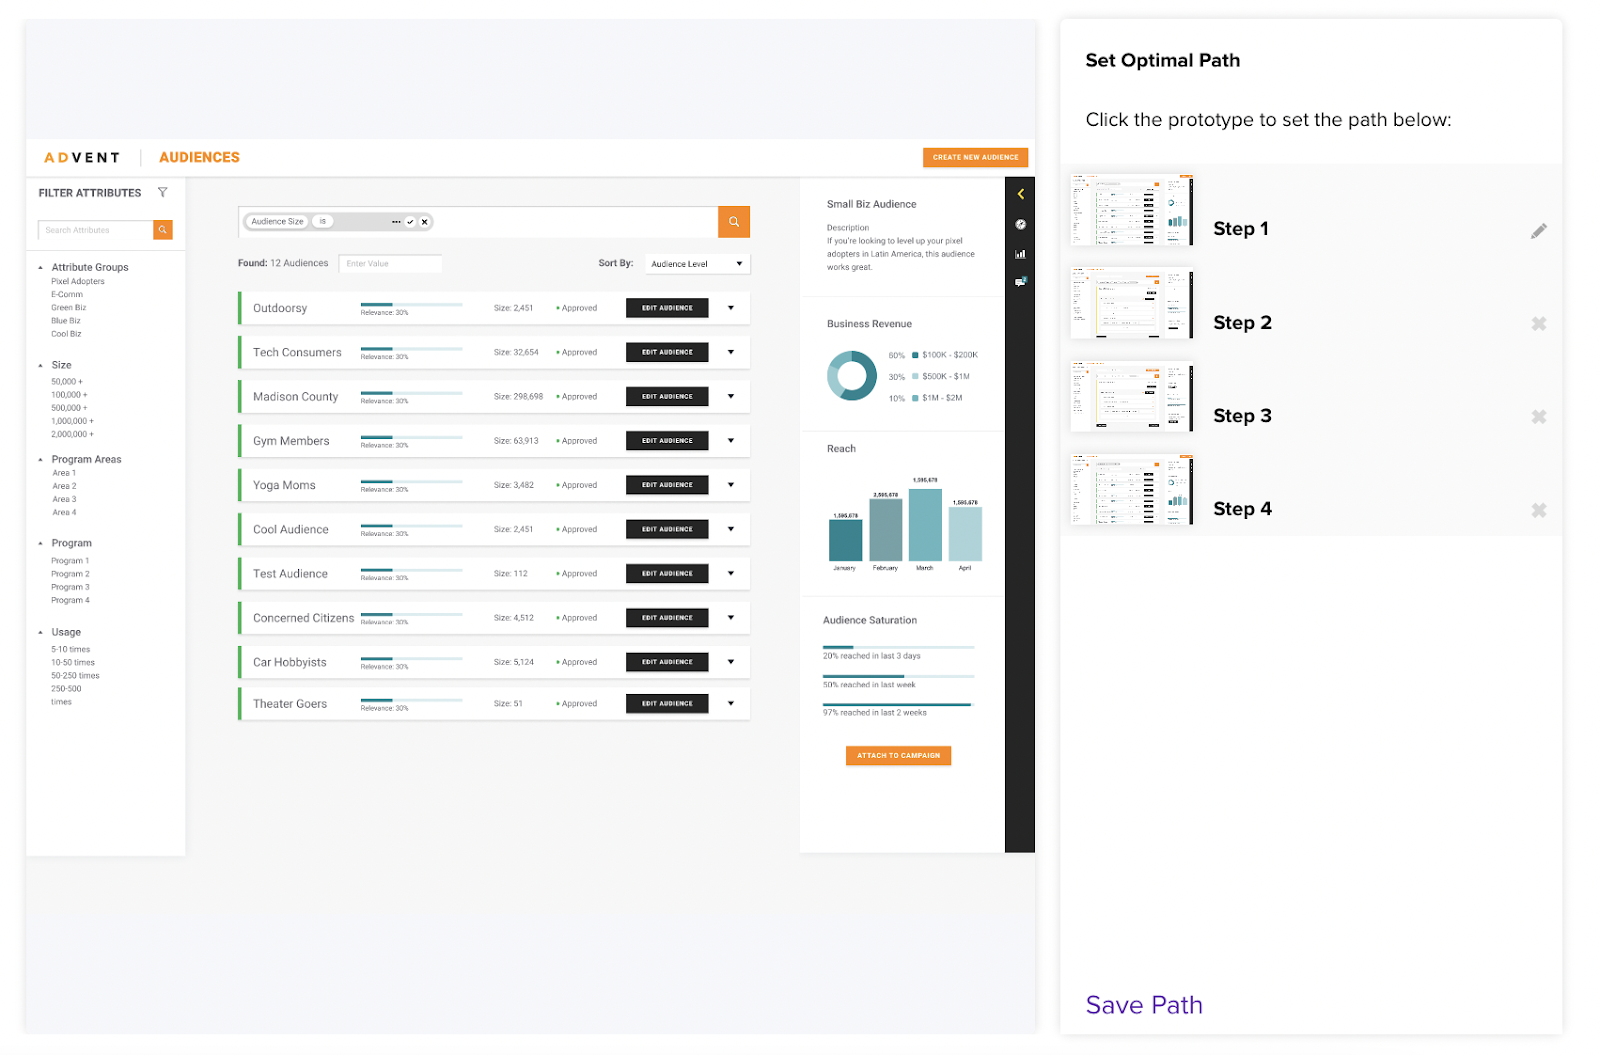
Set optimal path
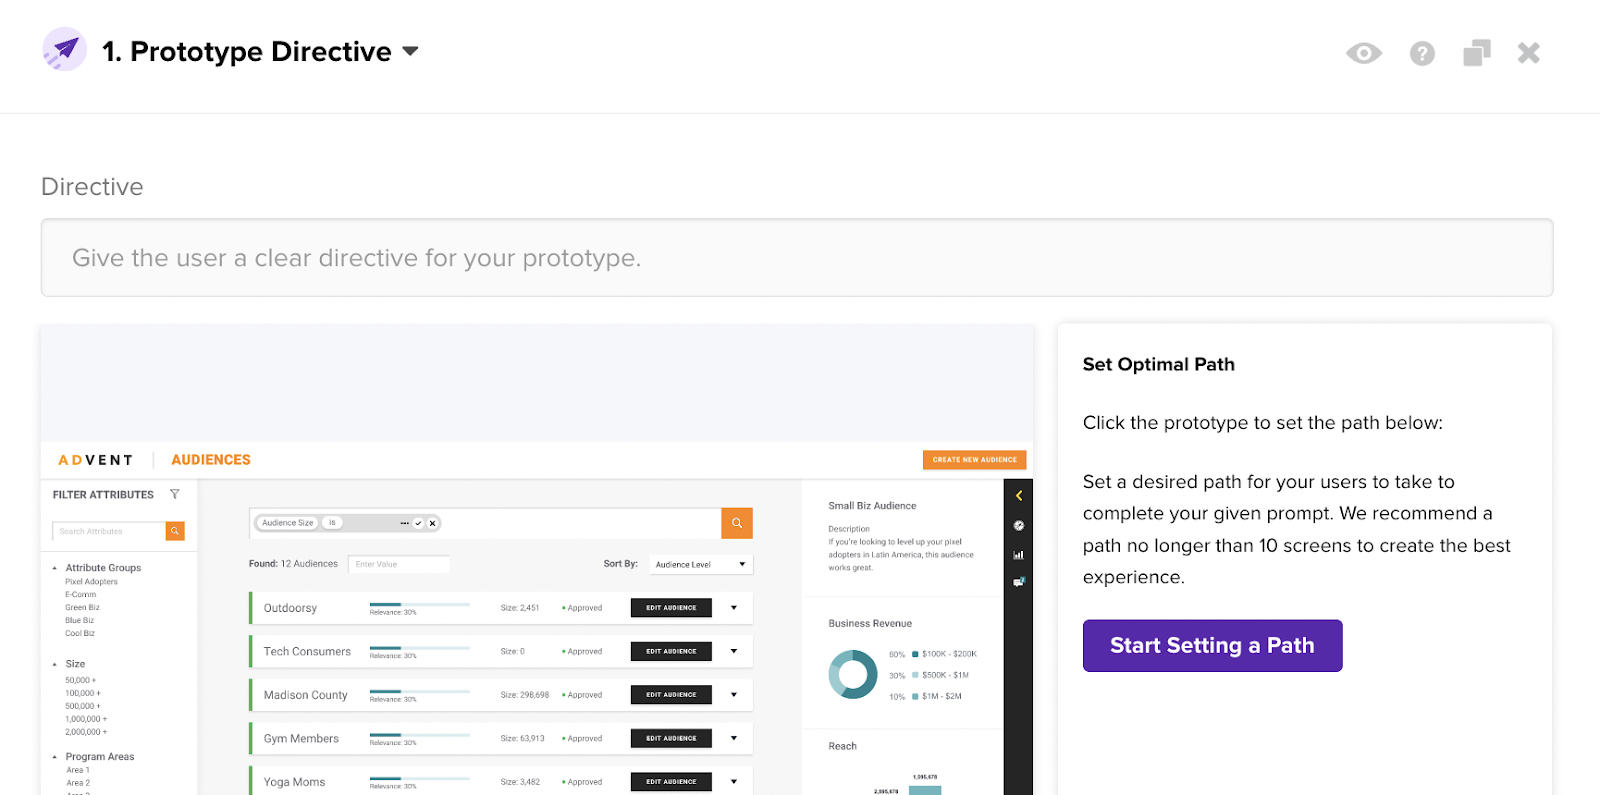
Once you’ve imported your prototype link, a live view of your prototype will appear in the box on the left. Start Setting a Path to outline the success flow of your prototype test. The optimal path is the steps participants will take to reach the end of the user flow in your prototype.
The first screen in your prototype will be provided as Step 1, and when you click on the first action in the prototype view to the left, the next screen will be picked up as Step 2. Each screen in the path must be different, with at least a small change on each new page. Once participants land on the final screen in the path, they will be moved past the prototype question in the test.
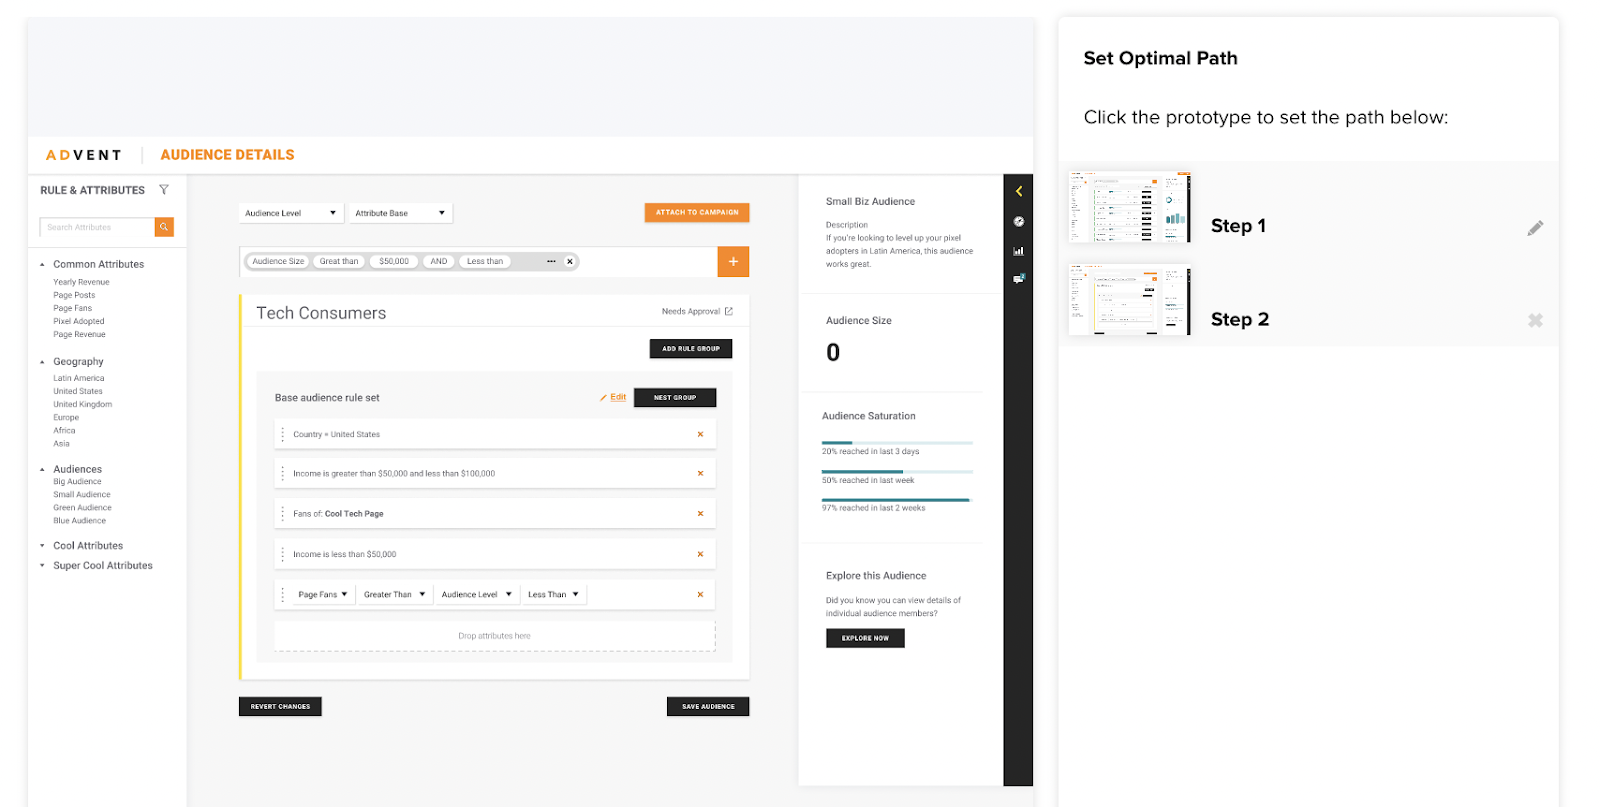
The pencil icon next to Step 1 in your optimal path allows you to reset the starting screen for your prototype. If your prototype is not imported on the correct starting screen for your flow, use this feature to reset your starting place.
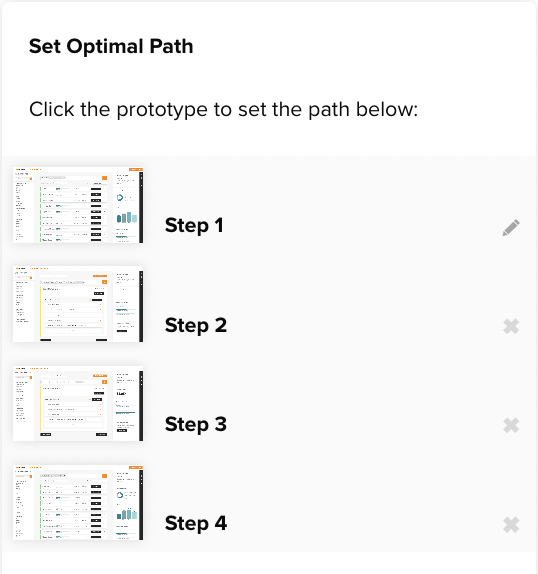
Press Save Path at the bottom once all of the steps in your flow have been set up. The Save Path action will then turn into an Edit Path action, will you can use to make changes to your flow if needed.
When writing the directive for your prototype test, try to use very simple vocabulary with as few words as possible. This allows participants to easily absorb the prompt without having to repeatedly revisit the directive while interacting with the prototype.
Show hotspots
In the bottom right corner of the prototype directive card, you can toggle your Advanced Options, or turn on/off Hotspots for your prototype.
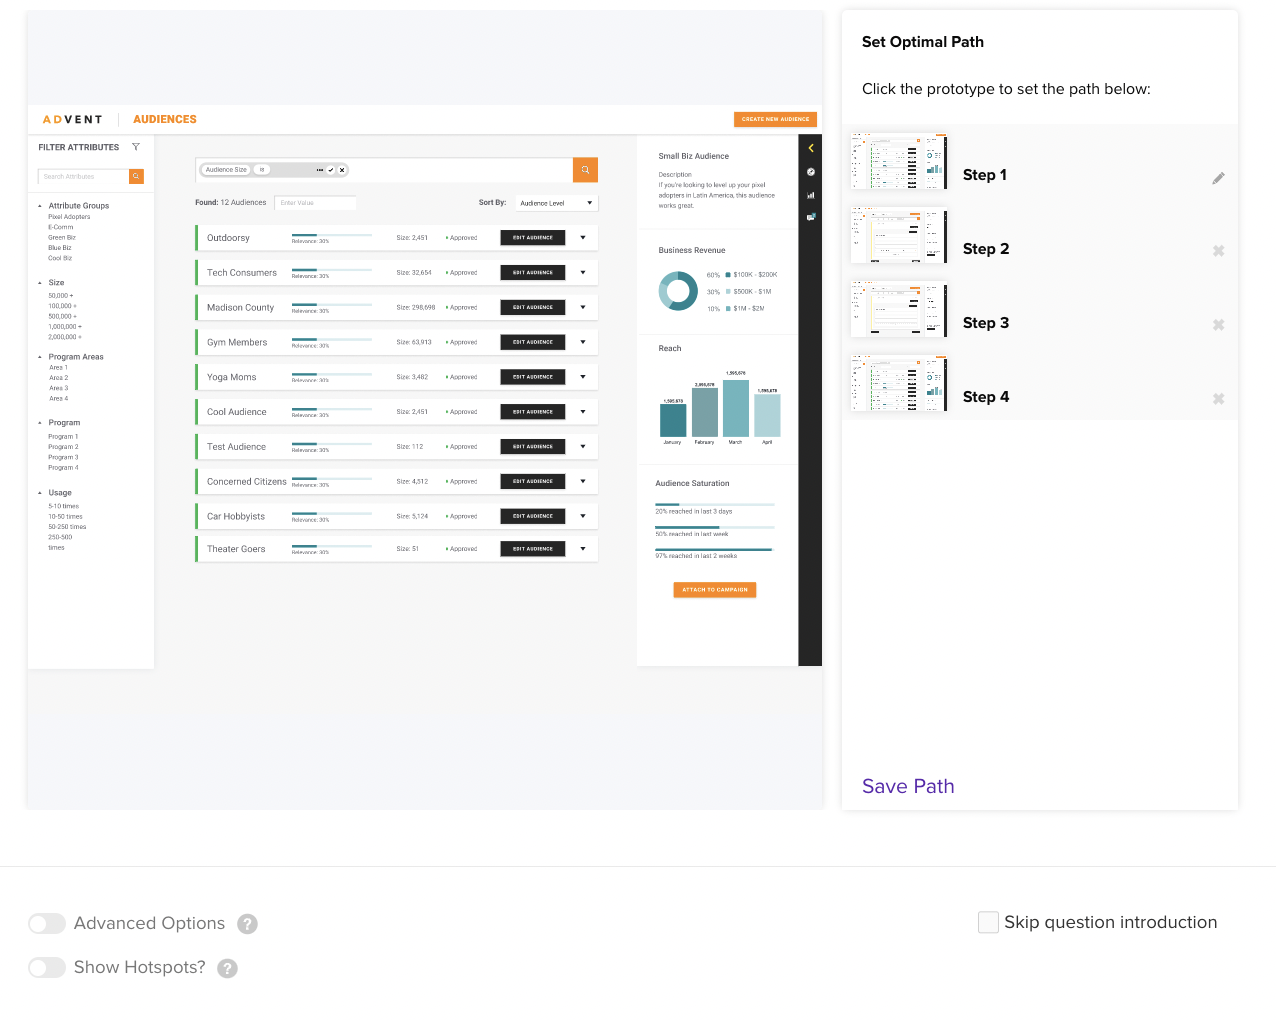
Hotspots are the light blue boxes that highlight the next click area when you click randomly on a Figma prototype. These give hints to the test participants that may skew the results of your testing.
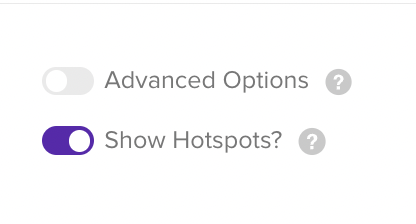
Note: The hotspots toggle is turned off by default.