Design Process
A look at our lifecycle flow to help you develop better products.
The Helio Team
. 5 min read
The nuts and bolts: A design process is a series of activities carried out by a designer, which may include the use of design methods. A design can be simple (a quick sketch) or complex (a lengthy process involving extensive research, negotiation, reflection, modeling, interactive adjustment, and re-design).
Setting a plan is much more than just setting timelines and adhering to your due dates. Planning should be quintessential practice, for projects, events and even day-to-day implementation to your life. Having a detailed, structured plan is what the Design Process encompasses. It is a series of steps that one follows during the formulation of a product from start to finish. In short, the design process is a five-step design thinking process.
For us at ZURB, the process includes, but is not limited to: identifying opportunities, creating lo-fi sketches, determining requirements of your product, developing a style guide, and then identifying and rectifying any problems your product may have.
Having an established process to follow allows us to focus on the main functions and core principles of our current and future projects. Sequentially, it allows us to build the best possible products. And like with everything we do, we’ve iterated on the process, refining it over the years. This lets us not only expose our process but showcase one of the important elements in it — iteration.
Previous Process
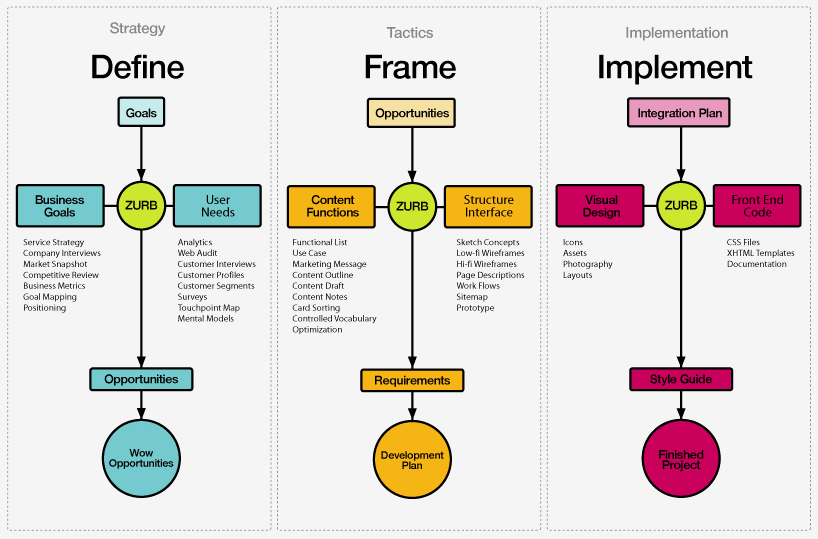
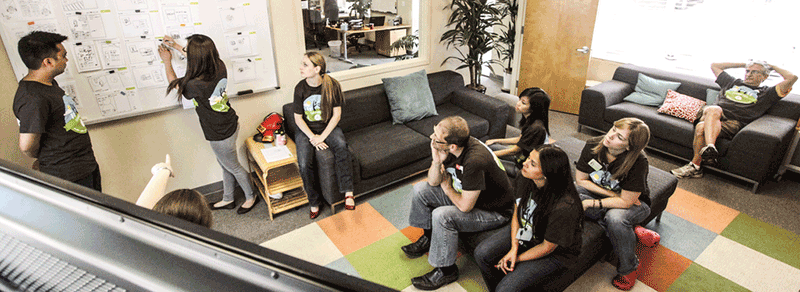
This is ZURB’s original design process flow. All of the necessary phase components for creating the most complete and effective products in your desired market can be found within. Over time, however, we found a few opportunities that could help most people decipher what in the heck was going on with our chart.
Even though all the necessary components could be found within the flow — there weren’t any smooth transitions from phase to phase. Altogether it seemed a bit clustered.
New Process
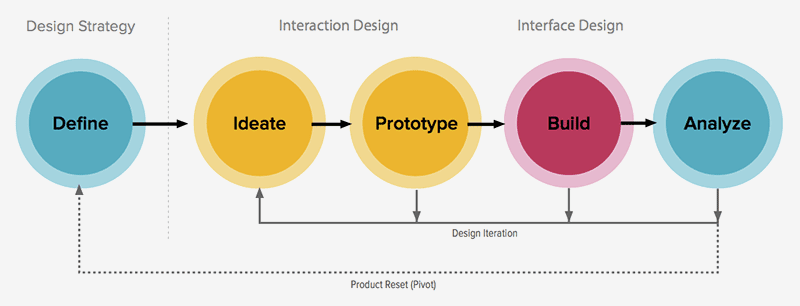
The new design process flow was developed to help give a more streamlined approach to our design process. We eliminated the clusters of steps in our three-phase approach and then cultivated five, much more focused, phases within our new process.
Though not much has changed throughout the process, we’ve streamlined it. This was developed from opportunities we found in the older process. We wanted to create an easy-to-follow chart that non-designers and designers alike could follow and work off of together.
We like to follow these guidelines when creating our own products. Part of our refinement was also to have overlap with our product suite.
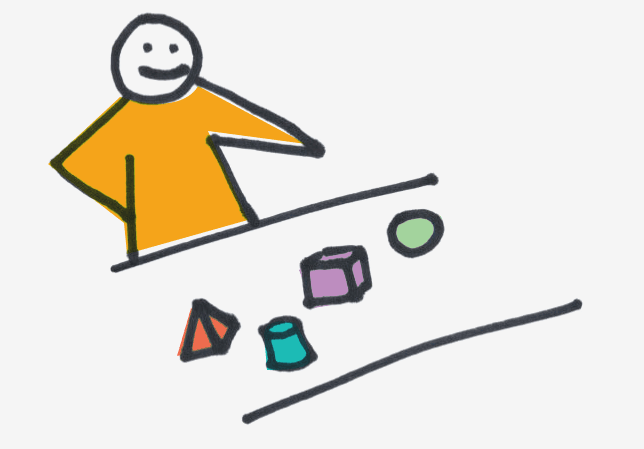
Define
How does one begin developing good and useful products? Well, you have to find a problem in the status quo and develop opportunities that you can capitalize upon. You must define what you plan on creating — the define phase is aptly titled. You must begin defining user needs, what goals you plan to accomplish and how you plan on positioning yourself within the competition.
Determining the user needs is crucial. You can develop, what you believe to be, a great product. But if the end-users don’t have a need for the product, your product will not survive.
We know that if you have done adequate research for defining your product and its competitive positioning, you will have set your best foot forward for continuing onward and upward with a successful product. Let’s take you through the process of building one of our own products to help illustrate the design process.
Eating Our Own Dog Food
While Verify was built around our previous process, it still holds true to very core values of the new process. It easily still plugs in and gives a sense of how a process can move you along.
We started Verify by defining all of the opportunities, aspirations and goals that we saw available in the market. We realized all of these goals would help grow Verify from ambition to be a staple of our previous ZURBapp suite (which has now evolved even further into Helio.).
Once you have set your definitions, aspirations and goals, it’s time to push onward through our process.
Ideate
Following the definitions of your product comes the creation of concepts, of which is found within the ideate phase. You will find yourself creating, drawing, sketching and otherwise developing the visual flow of your products. This is the skeletal system that will be developed upon throughout the design process. Another important aspect of your ideate phase is how you plan on creating marketing messages and content outlines — all of which should coincide with your design sketches.
Sketching Our Future Out
Time to pull you back to our example. Once we had defined what opportunities Verify had within the market, it was time to sketch up lo-fi concepts. Our purpose with these sketches was to present the functions and flow of the eventual Verify product. We needed to present the most structured guideline to lead us into the prototyping phase.
After you have laid out your skeletal design and the flow is looking as nice as a mountain spring, it’s time to hit the prototype phase and begin building prototypes of your product.
Prototype
Here you will find yourself fleshing out those skeletal sketches and turning them into hi-fi wireframes. You will also find yourself validating the ideas of how your product is going to work with your end-users. User testing your hi-fis is definitely important to make sure all of the features within your product run smoothly and without a problem.
The prototyping phase holds quite a bit of importance. It is where we get the best answers quickly. We get these answers by eliminating that which is clearly wrong and moving on.
We strongly adhere to the thought that rapid prototyping and iteration is key to success. By developing front-end prototypes you can get more in-depth responses from your team — as well user test responses — you can push to make your product bigger and better sooner.
The validation aspect of the prototyping phase comes from user testing. As designers, we have a clear idea of how we want our product to work and how we would want our audience to interact with our product. However, the world does not function according to our thoughts (unfortunate, we know). The implementation of user testing — might we suggest an unmoderated user test? — helps us to understand user behavior and see just how our end-users would interact with our products in the real world.
In the case that we find there were problems with users interacting with our product, then it’s time to go back and make some revisions to help clarify and delineate better instructions. On the opposite end, if the results from the test validate our expectations, then it’s time to push forward into the build phase of our process.
Rapid Prototyping: We Don’t Just Preach, We Practice
With our example, Verify, our prototyping phase was accomplished in two weeks. This is a rather quick turnaround for a working prototype and not the only thing, but this was one heck of a working front-end coded prototype. We put our nose to the grindstone and knocked it out quickly, with the help of a few components.
- Since Verify was going to be a part of our app suite, we simply borrowed the visual cues from one of our previous Notable app and made a few variances.
- The use of our global CSS file, which we use for all our products. It was due to the nature of the CSS that we didn’t have to futz around with thousands of lines of basic code that would essentially do the same thing.
By providing the most feature-ready prototype for testing, you can get adequate feedback and decide whether you need to iterate upon the design and amend some problem areas or push forth to build a more polished product.
Build
The build phase is where we take all the information and feedback gathered from prototyping and we begin to build the product with design layouts and build upon our already established front-end coding. Thus, resulting in your final iteration — we put the asterisk solely because there are times we revisit a “final” product and iterate upon it.

Now your finished product is ready for publishing to the masses. Remember when building the final iteration of your product to have a strong, nearly complete front-end for the engineering team.
When you have a clear idea of the functionality and intent of your product, it becomes clearer to expose where distinct problem areas may reside and opens the discussion for solving any problems with much more ease.
Polishing Our Products
Thanks to building our Verify prototype with a solid front-end, it helped in creating a precise layout and style guide to follow when building the full product. It’s time to, once again, put your nose to the grindstone and churn out a great product to its fully polished and ready state.
Here you visualize your end product that will be produced for the population to consume. That is what is being built.
Analyze

Once your product has been made available for the world audience, you should dive right into the Analyze phase of the design process. In this phase, we will gain insight into our newly published product. We attain these insights through product research and user feedback.
The Analyze phase is quite a pivotal point in the design process. We’ve mentioned that it’s important to receive more user feedback and product research to see if your product is truly ready to meld with the end-users. More testing is definitely necessary — it’s all about testing, testing, testing.
There is nothing more telling than the results of user testing. The more feedback you can garner with your end-user audience, the more sound your designs will be for said audience. The more your audience praises your product, the better your product will fare in the market and against your competition.
Analyzing Our Hard Work’s Results
During the entire timeline we had set for getting Verify out, we had our sights on getting a version released for a demo event. Upon meeting our target date, we delved into analyzing our product garnering feedback amongst the attendees. Throughout the event we continued to iterate, refine and augment our product in a number of key areas.
Even after meeting our deadline, we continued to receive feedback from product analysis which helped us push harder to create the best product that Verify could be. A few months later we had arrived at our final iteration of Verify.
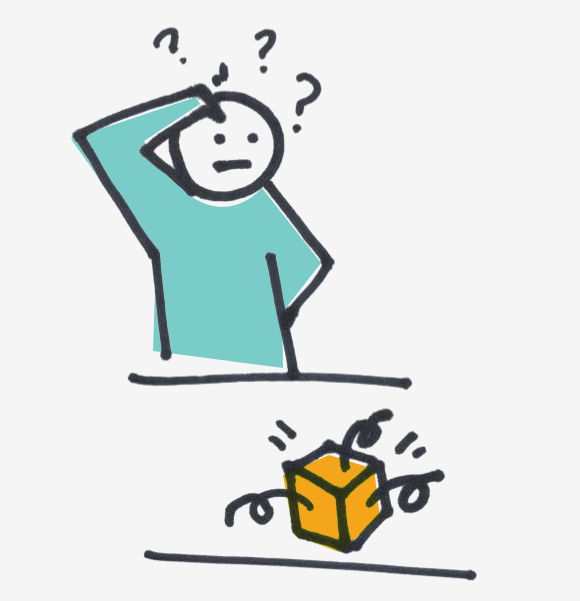
But… I followed the steps…
If we find ourselves running into any problems — which we prefer to call opportunities — we can always return back to the Define phase and begin over again. However, if you don’t feel like hard resetting your project, you can always just iterate, as we mentioned earlier, and just make changes to your already created design and make the features sing even louder than before.
There are two concepts that are connected to these ideas.
- The pivot point often comes during the analyze phase. One of the biggest reasons behind a project or product pivot is when organizations find that their product no longer has a place in the market to grow or succeed — or if there is even a market for their product to begin with. A pivot helps you from incurring more losses for the previously listed reasons. A pivot can be the difference between losing it all and losing some time and a few dollars.
- The other concept, iterative design, is the less radical approach to redesigning a project or product. Iteration is when you may go back a phase or two to make quick changes and iterate upon your already developed concepts. You can even look at our Design Process as an example of iterative design. We didn’t scrap the whole process when retooling it, we simply took what was already established and moved things around to help exemplify and clarify what we wanted the process to express.
What’s So Great About the Design Process?
The Design Process explained in its most rudimentary form would be that of a guideline. There is no set start point for your own product’s design process, but the concepts and focuses of each phase are essential in helping you to build bigger, long-lasting products for the world to enjoy. Without a clear concise plan, you are only setting yourself up for a long road of setbacks and delayed products.
The design process keeps you focused and on schedule. If you follow these phases by putting your hardest work forward, it should help you form the best products you possibly can. So go ahead, take your current projects and figure out what phase you could potentially put it into and follow the steps accordingly. Then track your progress and see just how beneficial the design process can be to you and your projects.
Kick Your Design Process Into Hyperdrive
Helio can be plugged into any stage of your design process, from the early stages all the way to analyzing. We have dozens upon dozens of test templates you can insert at any stage. But to get you going, we’re going to recommend first that you validate your audience. Once you know who they are, then it makes the rest easy as 1, 2, 3. Then you’ll be breaking all kinds of speed barriers.