Journey Maps Chart Your Customers' Course
Method: Sketching | Deliverable: Journey Maps
Do you think if Frodo and Sam had Google Maps on their journey through Middle Earth it would’ve been easier? Either way a map would’ve been useful in their goal to destroy the One Ring. If only they had a journey map before they started on their adventure.
Journey maps allow us to explore opportunities holistically. It also sets goals we can act on right away. By mapping out a customer journey, we’re able to pinpoint where interactions come into play and how we would design those interactions.
When done early in a project, journey maps can be extremely helpful in figuring out how a customer will use a product, even before we go into wireframing specific screens or building a product architecture.
Coupled with user research, journey maps can help us figure out specifically what drives customer behavior. It lets us examine scenarios and map out important user moments, tasks, and steps. Sketching a journey map sets short and long-term business goals focused on the customer’s needs.
Guide Objective
The guide objective of this section is to map critical steps in the customer journey to asses the potential of ideas.
Goals of a Journey Map
The goal of a journey map: help a project team visualize the most important parts of a user’s experience before jumping into creating specific interface screens in a workflow.
- Find the most important ideas so the project team can rally behind building a workflow that creates the most value for a user.
- Visualize the customer journey so it becomes easier to build the right interface screens.
- Highlight critical user paths that will influence the product architecture.
Method
Journey maps are the perfect tool to understand the customer problems. This helps define business goals and technical constraints. Great product teams visualize customer journeys together. Sketching a journey map keeps the ideas flexible and defines the product vision.
The worst teams don’t set goals at all. Mediocre teams set very general goals and define tasks that need to be completed. Top teams set very specific goals around a desired outcome and shape the process for how they want to get there.
Start a journey map by using opportunity sketches and goals
- Start a journey with either an existing list of goals or a brainstorming exercise to let loose ideas so that new opportunities can emerge.
- It’s best to involve team members early at this stage and get as many tasks out on the table as possible.
- Competing or unstated goals and hidden agendas can sneak up and sink the project team soon after if these are not surfaced.
Sketching out workflows reveals the steps a user will take
These steps are put into sequences that end with a goal, and are a great gut check to ensure the right product engagement.
- The customer lifecycle can help flesh out these flows. Looking at the entire customer lifecycle forces us to explore holistic goals that cultivate healthier customer relationships and better support the business operations.
- Three stages of engagement in the customer lifecycle: Lead Generation, Acquisition and Retention. A great product addresses all of these stages.
- You should know your customers really well from interacting with them almost every day. Customer service offers a wealth of insights. Customer interviews can inject fresh empathy into team members who interact with them less often.
Here are some helpful attributes to apply to specific steps in a journey. Use these to capture an idea
- Mood — how does it make them feel?
- Relevance — is it important to them?
- Timing — when and how frequent?
- Type — push to them or pull them in?
- Call to Action — what is the next step?
- Takeaway — what did they learn?
- Half-life — how long will they remember?
A great product might have 3-5 key journeys that solve the most pressing customer problems
- Combine opportunity sketches into groupings of similar concepts. Your user stories should help frame these groupings.
- Bucket the journey maps into categories based on the user stories and experience map.
- Prioritize the journey maps based on the most important steps in a workflow. Ones that need figuring out and others that need validation
- Use the product team to solicit feedback. Posting a journey map on a board can help a product team facilitate a feedback session.
Deliverables
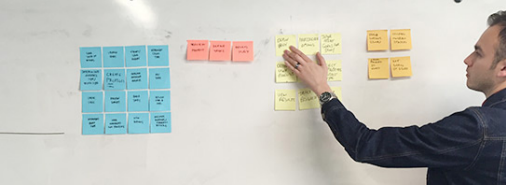
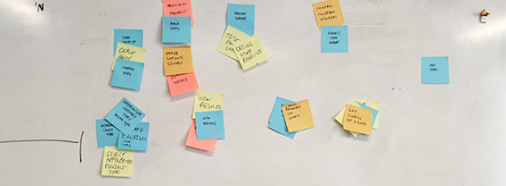
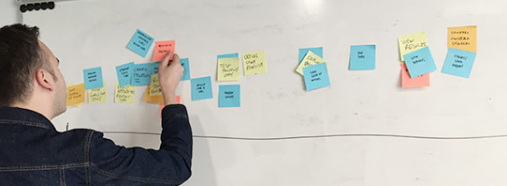
Journey map begins by utilizing all the steps, tasks or opportunities that have been identified through research or hunches. This can be done with sketches or Post-It notes that capture the steps a user takes within a product or service. Below is an example of a journey map created with Post-It Notes.
Team exercise
Hand out a stack of Post-Its to all participants. Instruct them to take 10 minutes and write down as many user tasks they can think of. One task per sticky notes. These should be major tasks like log-in, check analytics, or create a new item. Make sure to timebox the team and have one individual give both time updates and encouragement if anyone seems stuck.
Next, group tasks together to combine duplicates or similar tasks that may be just phrased differently. This will also highlight outliers, so ensure to discuss lone Post-Its to gain insights on why only one member of the group has chosen it. The validity of a task can be highlighted by how much debate and interest these outliers get and can even take an opportunity to build on it and solidify it more.
With the basic groups done, you can start ordering them on a timeline. Lay groups out on the line. Everyone on the team can do this and it shouldn’t take more than 30 minutes. Don’t worry about order. It’s perfectly OK to guess and put a task where it seems best on the timeline. You can always move it later.
Since Post-Its have been used, every member of the team can easily move a group around and discuss the way this would affect the overall experience of the user. We can also branch the flow, if some tasks or steps are discovered to be optional or concurrent flow based on the user type.
Step back and analyze the timeline once the basic flow is complete.
An opportunity to understand the best flow
This is an opportunity to note where the team understands the flow best and where they need to work harder at understanding it. If some steps have piles of Post- Its while others have fewer, this may be a sign the need or purpose of the smaller section needs more exploration.
Got too many individual steps? Then combine or consolidated them into steps for a user.
It’s important to note that this is an early deliverable and should be used to focus the team. If the team feels good about the journey map, deeper dives can be taken in separate sections, focusing more on individual interactions that make up each task. If there are gaps in knowledge, the team can head back to user interviews or research to help better understand the tasks at hand.
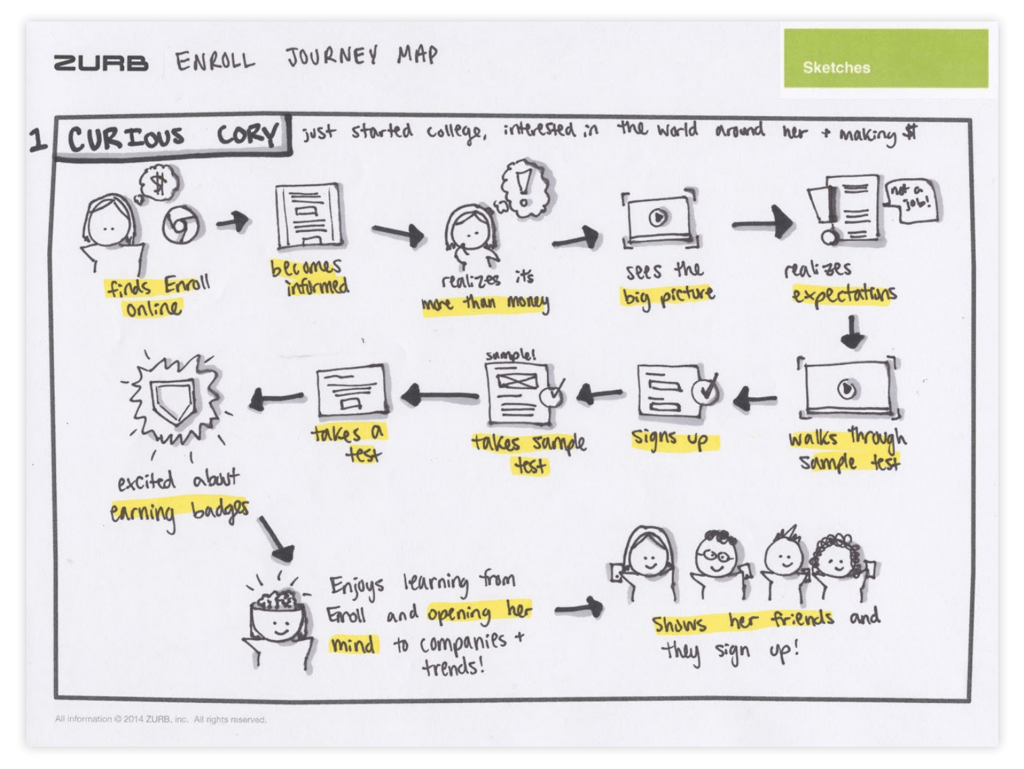
A journey map can be a series of sticky notes, a linear sketch of steps or a visual journey captured with thumbnail sketches.
Examples

Test your Journey Map: This is a great time to use an action map to test how your journey map matches your target audience’s expectations.
Create a survey within Helio to ask your target audience specific questions on how they would complete a task. These tasks should align with the user’s journey you have mapped out previously. The result should guide you in pain points within your journey map before you move on to wireframing.
Example
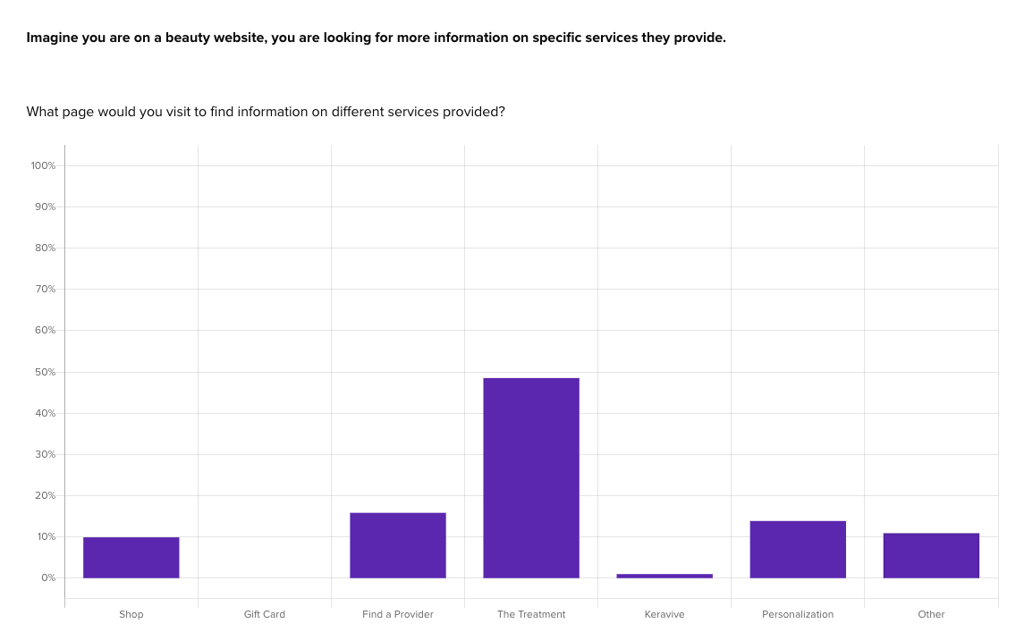
Take a look at this example of a question. Here, we asked beauty consumers to understand what page they expect certain information on.
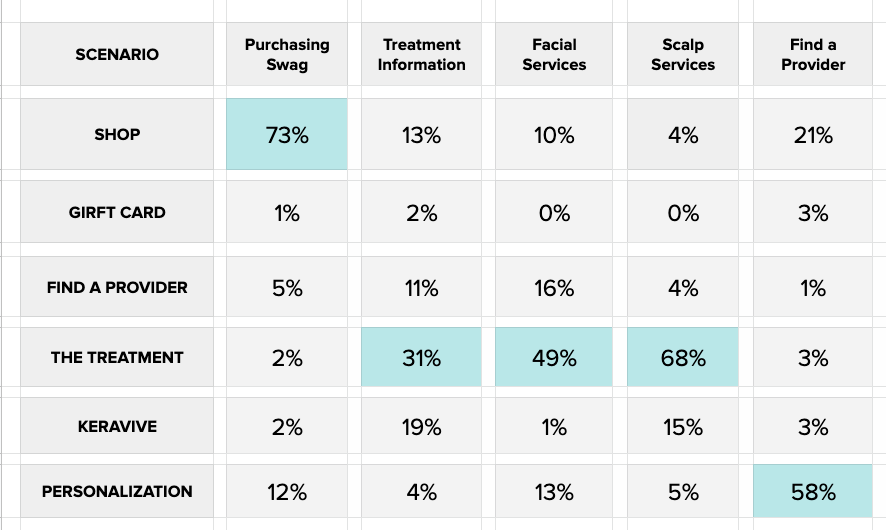
Once the test is complete, aggregating your results in a spreadsheet helps to make the data easily digestible. You can compare the results against your journey map to see how they match up. The screenshot below shows participants expect to find treatment information and the information of the different services on the same page.
Create a Journey Map in Helio
Helio makes it easy to map your customer’s journey. Get started with this easy-to-use template.
Next up: Wireframing